Sunday, April 19, 2009

Inner and Outer Wales On

The outer gunnel was attached using 1 1/2" screws that were countersunk. We will make plugs to fill the holes later. The plugged screw holes add to the overall athestic of the canoe. The final sanding on the top side of the gunnel was done by hand, as is all the finishing sanding.

This is a finished deck plate, also made of white ash.
After using cabinet scrapers to remove any runs in the epoxy in the interior of the canoe, it was sanded smooth. At least one more coat of epoxy will be applied to create a perfectly smooth surface.
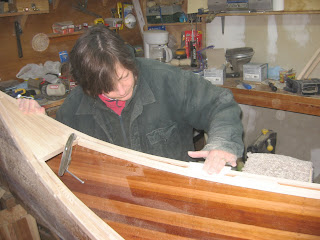
Scraping runs using a cabinet scraper.

The Inner Gunnel

Randy cut 3 inch pieces of ash to be used as spacers between the inner gunnel and the canoe body.

The spacers were attached to the ash inner gunnel using glue and 5/8" screws. The clamps held the spacers tight to the gunnel while the glue dried.


Here is a completed inner gunnel. We were unable to locate a 16' piece of white ash with which to make the gunnels. Randy spliced 2 12' pieces together using a long taper cup to make each of the inner and out wales.


The inner wale was fitted to the canoe and attached using 3/4" screws. The clamps were used to bend the ash to the shape of the body of the canoe.

The top of the gunnel was sanded to take out any little ridges.

Final Shear Line

To determine the final shear line, we clamped a cedar strip along the line that had been previously marked. The cedar was bent upward to follow the arch of the canoe. The line was etched into the epoxy with a utility knife.


After the line was etched, excess wood was sanded off using a belt sander. I always get the fun jobs.

Wednesday, April 15, 2009

Fiberglassing the Inside

It was harder to lay the fiberglass inside the canoe. We cut it six inches from each end as there is not way to get the 'glass right into the bow and stern.
The first coat was applied in the same manner as on the outside.
It was tricky painting the epoxy into the narrow bow and stern.


For the second and third coats, we made sure the epoxy was warmed on the heater. This makes the epoxy much more liquid so that we could apply a thin coat with the roller. Before the epoxy began to set at all, the coat was dry brushed to remove any roller marks and make for a perfectly smooth finish.


This is inside the canoe after three coats. All that is left is a light sanding and many coats of varnish. This will happen once the gunnels are on.


Sanding the Inside

Due to the curverature of the inside of the canoe, all the sanding had to be done by hand.
I got the job of sanding inside the narrow bow and stern as my hands are much smaller than Randy's. By the time I was done, my knuckles looked like I had been in a bar fight.
The inside is ready for fiberglass and epoxy once it is vacuumed of dust and cleaned with lacquer thinner.


More Coats

You have to apply sufficient epoxy on the first coat to saturate the cloth through to the wood so that the cloth adheres to the wood. Once the epoxy sets up somewhat, the excess is squeegeed off and discarded.
This is what the canoe looks like as the first coat is drying to the touch. The next coat must be applied before the epoxy completely hardens so that the next coat chemically bonds to the first.


Here we have one a second coat one the left half only. What a difference as the weave is covered.


This is after three coats. There are some runs which will have to be removed with a cabinet scraper before the body is sanded and a final thin coat is applied. It is best to leave the epoxy cure for a week before sanding to reduce the toxicity of the sanding dust.


Laying the Fiberglass on the Outside

First Randy laid out the fiberglass over the body and smoothed it out.
Mixing the epoxy. The pumps make having the right proportion of epoxy to hardener easy. One epoxy, one hardener, one epoxy, one hardener...

It is amazing that wetting out the cloth with the exoxy makes the cloth disappear.


Even I got a chance to try my hand at applying the epoxy.